How to facilitate a session?
Recording a session
Launching the recording
Open/close the contentMove your mouse over your table and click on the three dots on the top right hand corner of your screen, then click on Recording.
Select the parameters of your choice, then click on Start recording.
Comment: The recording is only launched for the table you’re on. If you’d like to record different tables simultaneously, move from table to table to launch the recordings.
nb: Only avaliable in our Virtual Classes offer.

Stopping a recording
Open/close the contentMove your mouse over your table and click on Stop on the top right hand corner of your screen.
Name your recording in the pop up window, then click on Stop and save.
Comment: If you launched several recordings, you have to go to one table to another to stop them.

Finding a recording
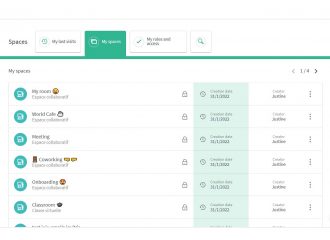
Open/close the contentFrom your dashboard, look up for the space in which you launched a recording. Click on the three dots on the right, then on Recordings.

Renaming a recording
Open/close the contentFrom your dashboard, look up for the space in which you launched a recording. Click on the three dots on the right, then on Rename.
Edit the name, then click on Save.

Deleting a recording
Open/close the contentFrom your dashboard, look up for the space in which you launched a recording. Click on the three dots on the right.
Click on Delete, then on Confirm.

Sharing a recording
Open/close the contentBy default, the recording tool is available for all administrators of a space. To share it to other participants:
- From your dashboard, look up for the space in which you launched a recording. Click on the three dots
on the right then on Public access then on I confirm. - Click again on the three dots
then click on Share. Copy the link and share it.

Downloading a recording
Open/close the contentFrom your dashboard, look up for the space in which you launched a recording, then click on the three dots on the right, then on Download.

-

? How to communicate during a session?
- Communicating with the other participants
- Sending messages
- Editing your digital business card
- Configuring your equipment
-

-

-

? How to customise a space?
- Customising a space
- Customising a table
- Adding a Glowbl space in Teams
- Adding a virtual background to a webcam
-

-
⚙️ How to manage your account?
- Managing your spaces
- Managing your account
- Linking spaces
- Duplicating a space
- Exporting attendance times


